Getting Started with Jupyter Notebooks
Jupyter Notebooks is a web-based python IDE that can be used for data analysis and visualization, a popular tool among data scientists and python developers alike. Offering users some versatility and other options that are missing when using python in the terminal. While there are certainly cases in which you may not want to use Notebooks (see here), using Notebooks can make your programming workflow more efficient.
As a GIS user, you can leverage Jupyter Notebooks and the ArcGIS API for Python to manage ArcGIS Online content, perform spatial and big data analytics, utilize geocoding services and so much more. This article will demonstrate how to get started using Jupyter Notebooks, and get familiar with the technology.
Install Jupyter Notebooks
There are several ways to get up and running with Jupyter Notebooks for this tutorial.
Method 1: Local installation
You can install Conda and the ArcGIS API for Python, which comes preloaded with Jupyter Notebooks. To start, open a command prompt or terminal application and type the following to start jupyter:
jupyter notebook
Then proceed to the next section to continue.
Method 2: Esri Notebook Server
You can also use Esri’s notebooks server. Begin by clicking the “New” dropdown menu on the right hand corner of the page.
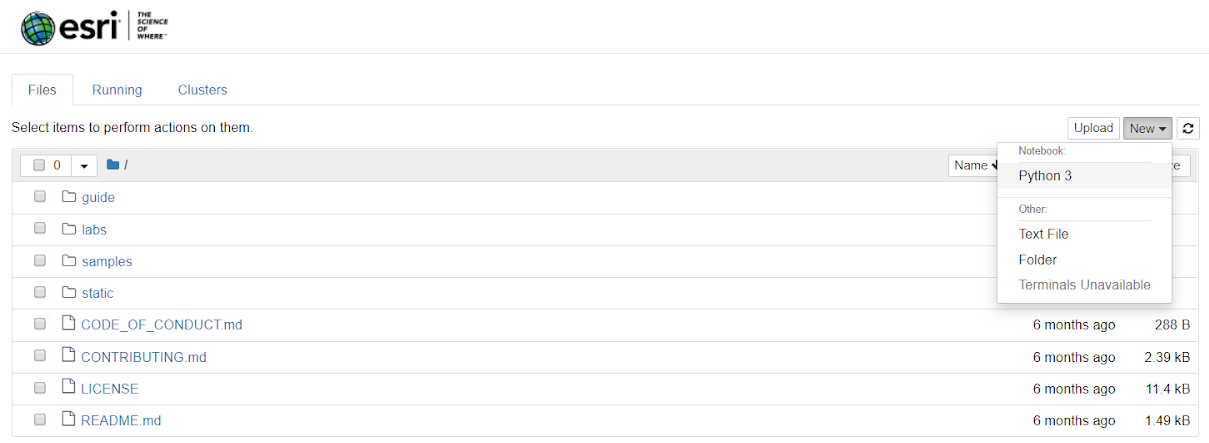
Then click “Python 3” to start a new notebook with Python 3 as kernel. Click on the Notebook name at the top and give it a descriptive name.
Get Familiar with Notebooks
An input cell on a Jupyter Notebook can be interpreted as either Code, Markdown or RawNBConvert. This blog will only be covering how to run code and markdown.
By default, all cells are set to be interpreted as python code, so if you want text you type to be interpreted by the Notebook as a heading or markdown, choose from the dropdown menu on the top.

To execute a cell’s contents, click the Run button at the top or press Shift and Enter together.

Pressing Enter after a line of code will allow you to move to a new line within the same cell. Let’s type a print statement into the cell and run it.

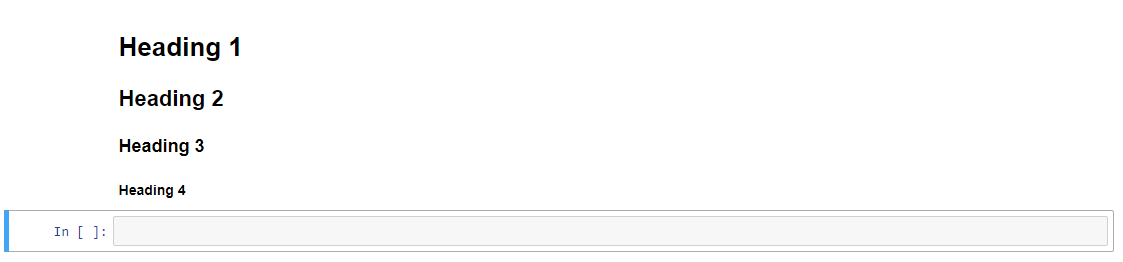
Let’s explore our options for creating markdown text in Jupyter Notebooks. To create headings, all you have to do is simply preface your Markdown cell with pound signs. You can add anywhere from one to four pound signs to indicate the size of your headings. See Figure 5 and Figure 6 below to compare heading sizes before and after running the cell.

To create italic and bold text, you can surround the text in your markdown cell by single or double asterisks, respectively. Asterisks can also be replaced by underscores.


Once the cell is executed, a new input cell is created below it. You can continue writing your script by typing more lines of code into new cells and running them in order. Running logical chunks of your code in independent cells can help when you don’t have a well-defined final process for your script. If you’re still in the prototyping phase of your workflow, cells that have already been executed can easily be edited and then re-executed again for different results.
Notebooks are like workbenches, where you can bring in tools to explore and run analysis to learn more about your data. Leverage data science and spatial analysis with a notebook that’s backed by server-based analytics.
Get Support
Need more support for Jupyter Notebooks? Have a unique GIS project in mind? Reach out to our GIS development experts to start a conversation about your unique needs today.